Cotton Surgical Masks with opening for a Filter
- De La Rosa Designs
- Mar 23, 2020
- 3 min read

New challenge for those needing to change it up from our first challenage!
These are easy to make, if you are like me, you have extra fabric laying around for projects and this is a good way make those left over pieces to use.
Design with Ease
"I am hoping that my students will take the initiative and make these at home as a community service project."
I will be giving you step by step instructions, throughout this blog. My email is ida@delarosadesigns.com if you have any questions. I have a PDF file I can email to you.

Let's get started
I created the pattern out of others I had found online, if you cannot do a 3/8" seam, adjust the pattern to a seam allowance you are comfortable with. A usual rule of thumb for 3/8" seam is edge of the fabric, following the edge of the sewing foot.
If you do not have 1/16" elastic, you can use any size thin elastic.
Download these images and print; they should print to 8.5 x 11 sheets.

Working on your pattern
As always, I start by printing out my pattern and transferring it to a cardboard or thicker paper so that when I am making multiples, I do not have to reprint when my patten gets ruined by my pins. In this case, you have a pattern within a pattern so it is easier to create two patterns from your original, because it has a main mask and a lining mask.
Remember that when you are transferring your pattern to write your instructions; plus if you need to add the extra seam allowance, this is your chance to do it and put your seam allowance on your pattern so you do not forget what you created.
Also, because this pattern has pleats, I put a small cut at the pleats lines on the pattern so that I can make the placements of my pleats.
These are a bit easier to make and take about the same amount of fabric. These are a one size fits all.


Working with your fabric
Cotton fabric, pre-washed is asked for these masks. It does not take very much fabric to make these. I traced this out onto fabric, plus mark your pleats.


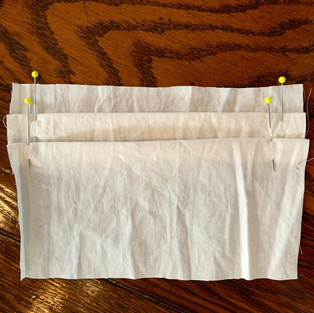
Starting your Pleats
This is where your marks are coming in handy. Start with your first line and remember to fold on the right side of the fabric. Finger press or use your iron.


The next step is to fold on the wrong side of the fabric the next marks on you fabric.


You will repeat this process two more times and each time make sure you pin and press.


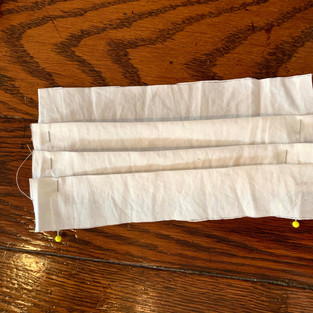

Start Sewing
You are going to start with your opening at the top. Mark 1" at each side.

Mark each side.

Sew to your mark at each side and do not forget to lock your stitches.


Top Stitch

Sew the bottom of your mask.

Cut your elastic to the required size. Cut 4 - 6" pieces, the elastic can be small and any color.

You will be adding these piece to each corner of the mask on the inside so that they are sew secure to the sides. Sew both sides and make sure you lock your elastic in with an extra stitch.

Turn your finished mask inside out and pull at each corner.

Top stitch sides and bottom; tie a knot on each side of your elastic to finish your mask.
You are now finished with your mask and if anyone needs to add an extra filter, they have the opening to slip their filter into the mask.

Love to all, and thanks for letting me be me!


Comments